Uh oh. Now you’ve gone and done it. I had a perfectly planned order of posts coming up and “you’ve done messed it up A-Aron”. Who am I kidding? Like I have a plan. Ha! Anyway, if you’ve been following along on Instagram or are familiar with some of my previous posts, you’ll know that I’ve done quite a bit of experimenting with Epoxy recently… and it’s awesome. I’ve actually had a handful of readers (yes I have more than two) reach out to me asking if I could publish a post on the topic. So by popular demand…
I give you… Fun with epoxy. But not too much fun.
If you didn’t already know, epoxy is magical. Not unicorn magical, but pretty darn close. It’s a polymer (meaning it bonds, like a glue, not a BFF) and it can coat and adhere to pretty much any surface. Wood, metal, stone… you name it. Did I mention it’s waterproof? They use this stuff on boats (with their flippy floppies on)! So why is a DIY/Hobbyist using it? Simple… to make projects look AWESOME. Oh, and it’s functional too. Sorry, it’s not all about looks… but look how good that looks below!
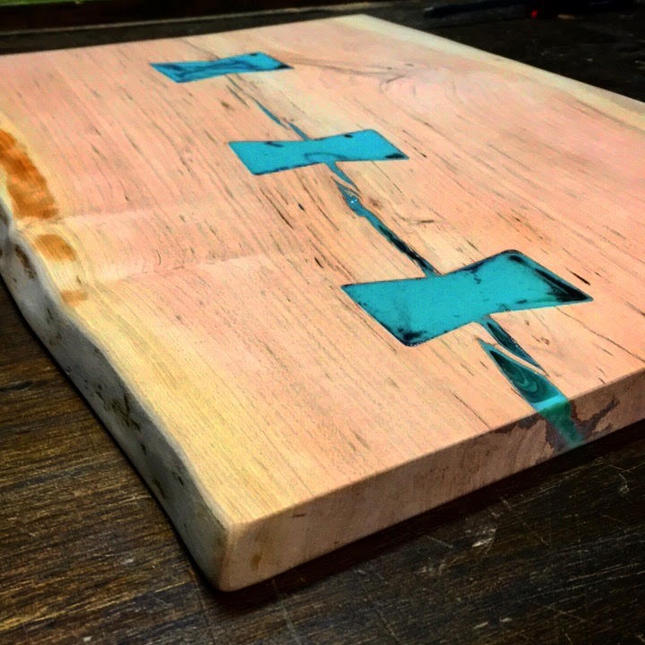
Admittedly, my first epoxy project (pictured below) was all about adding a little pop to an otherwise boring build. You might remember it from my Valentine’s Day giveaway where I built a magic magnetic key holder with a bright red epoxy filled heart in the middle. That was about as close as I’ve ever come to a decor craft project on my site. Credit to you crafty folk, I go stir crazy if I don’t have a project that’s not a full sized piece of furniture taking up ¾’s of my shop. While not the prettiest project, it was my gateway drug into using epoxy more with woodworking.

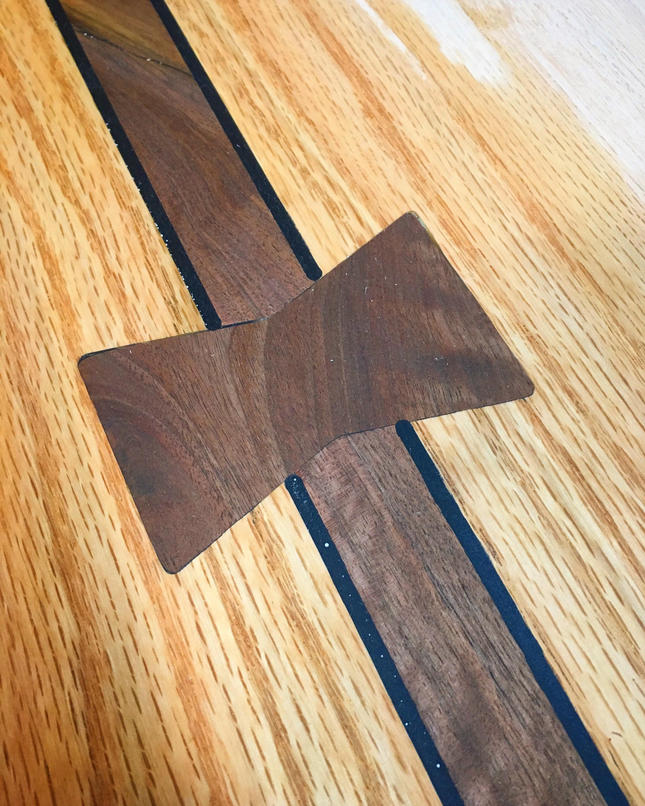
Where epoxy really shines though is with live edge lumber. A slab of cherry or walnut is beautiful and rustic… the knots and cracks make it as unique as Elsa’s “frozen fractal” snowflakes. But those unique features can also weaken your build as the wood moves over time, so something like an epoxy has the ability to fill those voids evenly and strengthen your material. Or even more obvious, if you have a giant knot in your perfectly good slab that’s supposed to be a desk, you fill that sucker up with epoxy for a smooth surface, like on the desk I built pictured below.
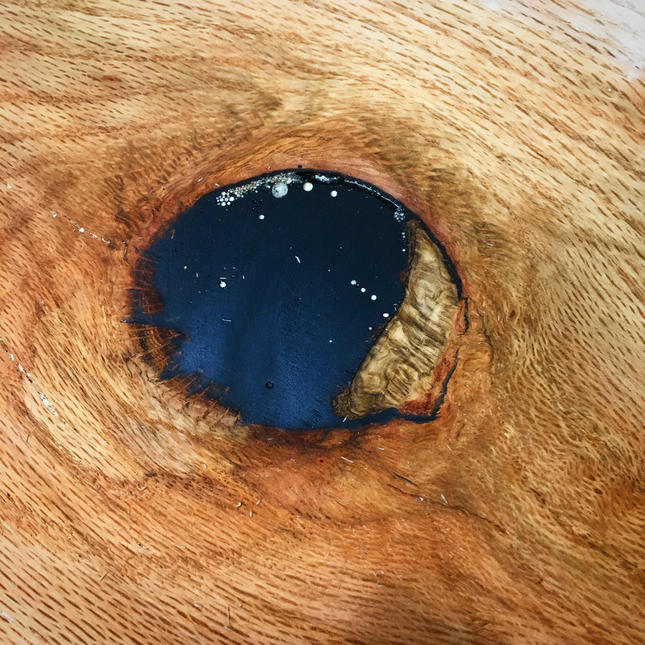
Because of its durability and it’s ability to permanently Velcro itself to pretty much anything, the possibilities are endless in how you can implement it creatively into your work. Just uh… make sure you’re wearing gloves when you use it because permanently epoxied fingers doesn’t bode well for your future projects. My buddy Matt from Keddie Woodshop is using tinted epoxy set in molds (like the image below) to extend pieces of live edge that would otherwise be scrap. Want to see what he made with it… click the image to find out!
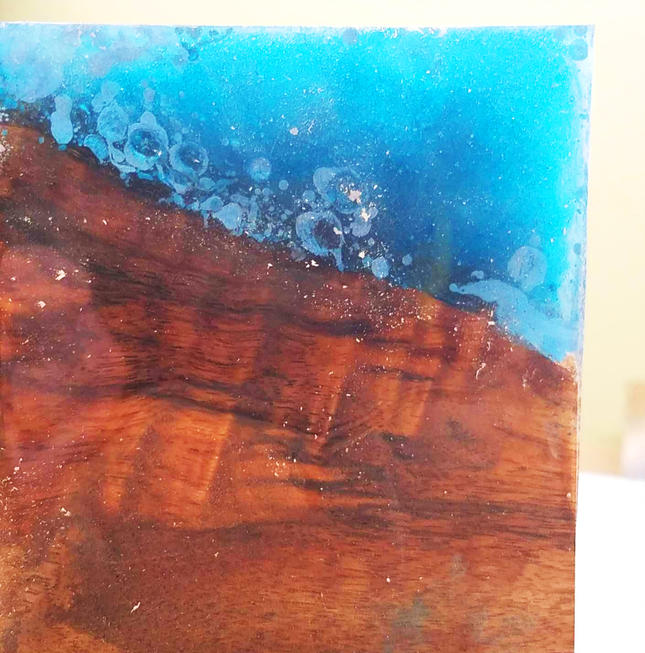
So where do we find this magical glue of the Gods? I personally get mine from Amazon. I’ve been buying this 32 oz. Clear Epoxy Kit from East Coast Resin (*affiliate link). I then use a drop or two of Epoxy Pigment or Epoxy Powder to change the color. In the immortal words of Jessica Simpson “A little bit goes a long way”… or “it says Chicken by the Sea”. Just know that one little drop can tint an entire 12 ounce cup of mix.
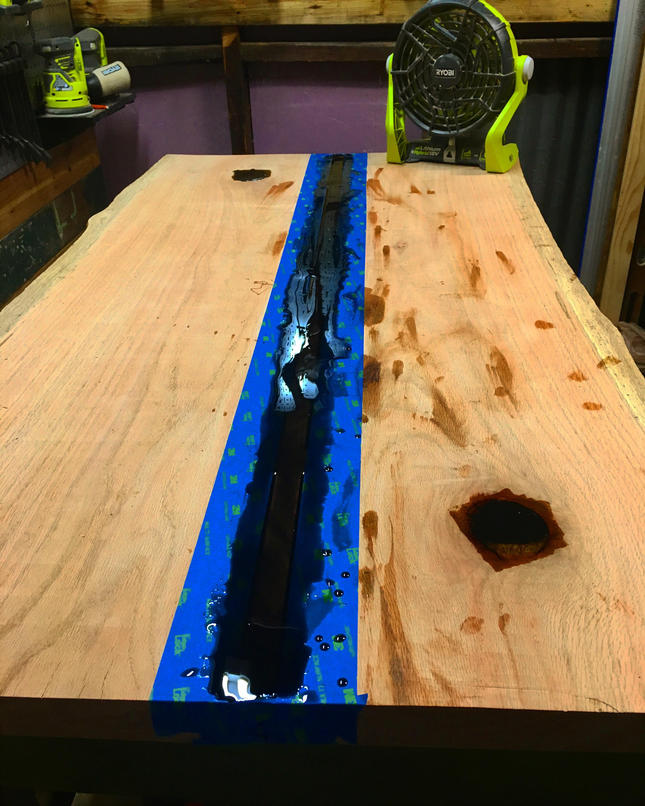
Let’s talk actually applying it though. It’s messy. You need to tape off your material if you’re filling knots or cracks or cut outs. I usually use good old blue painter’s tape and tape off the back (for the leak through) and around the edges of whatever I’m filling so clean up is easier. Prepare for the worst (isn’t that the coast guard motto?) and tape extra just in case.
Mixing is no joke. You get two bottles, one is Resin (the thick as molasses goop) and hardener (clear and runny). You need three clean and equal sized containers. Pour equal parts resin and hardener into their own cups. Then stir the resin for several minutes. Your hand will honestly get tired. The instructions even warn you of hand fatigue. I was honestly a little offended… but dammit they were right. My hand was tired. Jerks. Then you pour the contents of both containers into the third empty cup… and stir some more. Literally for several more minutes. You can do the math depending on the size of your project or wait until it starts giving off a little heat. What? Heat? No one told you there’s a dangerous chemical reaction about to happen? Yes, it starts getting warm and will eventually get hot, so hop to it before the reaction ends and your epoxy sets.
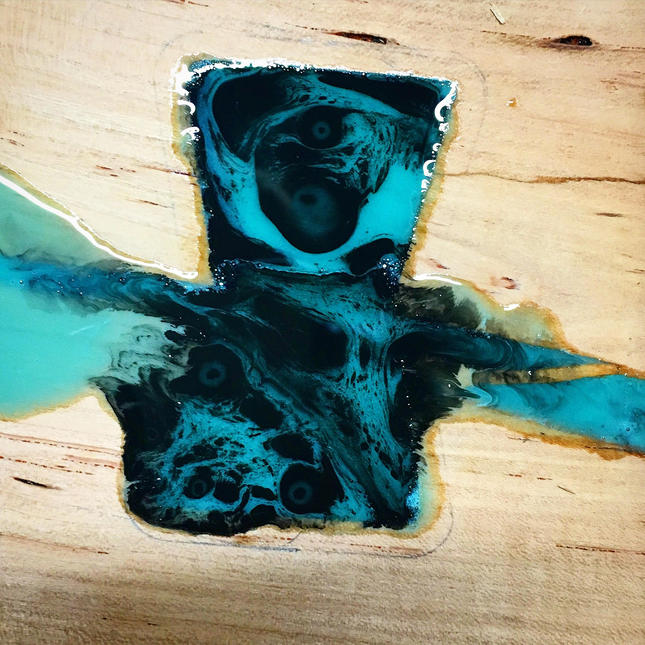
So how did I make mine so pretty? I added a drop or two of acrylic house paint and stirred to get my base color. Then after I poured my epoxy into the piece, I used a dropper and added a touch of black pigment dye. It dissipated and swirled on it’s own. It was mostly topical like you saw at the image at the top of the page, but you can actually inject other paint colors or dye with a syringe to make sure it penetrates the entire void.
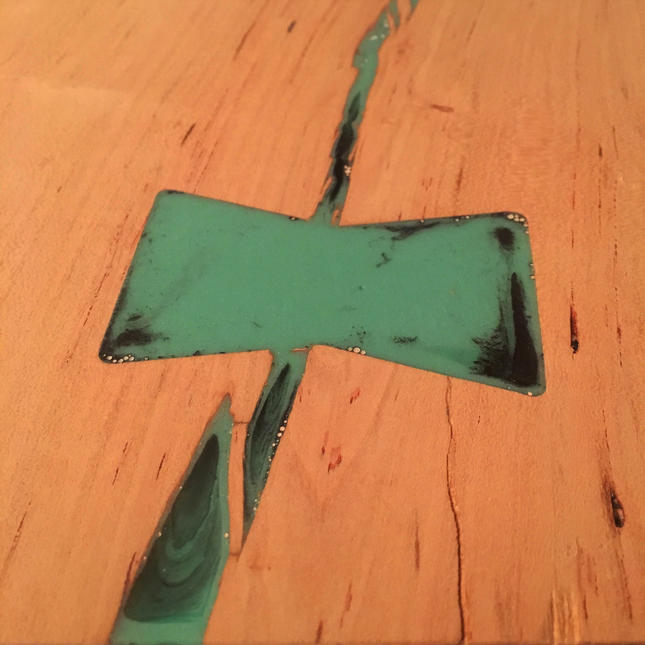
Let it set for the recommended timeframe (usually overnight) and then it’s time to pull out the sander. I should mention there might be a little “shrinkage” during drying. Don’t worry Costanza, it won’t be “I was in the pool” level of shrinkage, just know you might need to go back and touch up some areas as air bubbles rise out while the epoxy sets. When you’re happy (and it’s dry again) you need to sand off the excess (if you over poured like I did) so depending on the size of the space filled use a Random Orbit Sander or a Belt Sander (*affiliate links). I start with 80-100 grit sandpaper and then work my way up to 220 grit. Once all the waste is removed, I’m left with a perfect epoxy filled inlay that’s an extension of my wood surface. I sand and seal like the rest of the wood and sit back and bask in the beauty of the build.
~ Lazy Guy




Hey Lazy
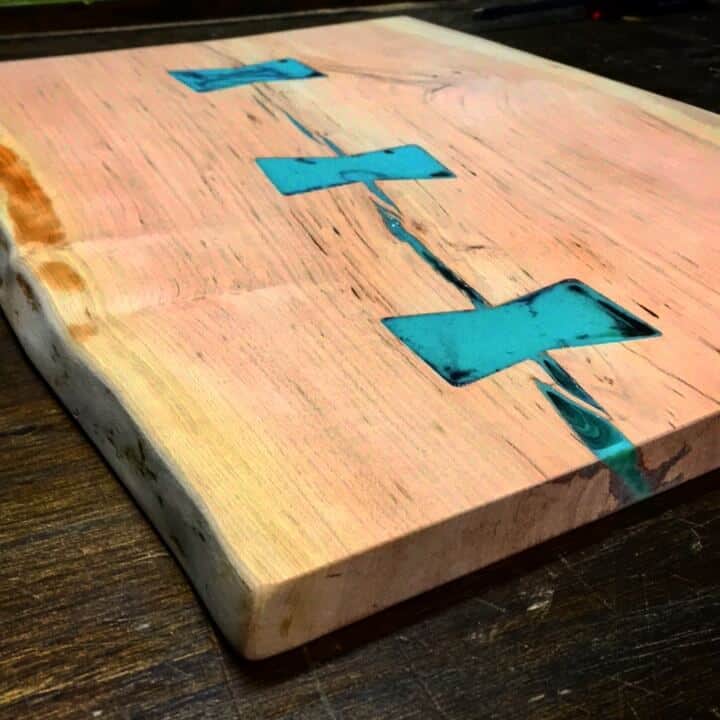
Ì love how you used the epoxy, those “binding wedge shapes” are excellent!
You’ve got me motivated!
You say the epoxy can fill dips – l guess that would suit darker colours?
But l guess you’d need the hole right through the timber for the light to bring the coloured epoxy to life eh…
Thanks for the jokes too, GO LAZY!
Cheers
Eric
Epoxy is so easy to use! Color honestly doesn’t matter, one or two drops and the clear epoxy takes on the color you need. Obviously if you want it to really glow then a hole all the way through makes a big difference kind of like the wedding cake stand I did recently. Good luck! I’m glad someone thinks I’m funny. Ha!
Cool projects,
I also recently started working with epoxy and found its a hell of an addition to a persons creative side, especially incorporating it in woodworking. Like you said “the possibilities are endless ” ( I don’t know why I use quotation marks, I can’t remember if that’s exactly what you said) but close enough. I make cool stuff all the time and people have always liked my stuff but like most things the excitement died down a little after people got used to it. Epoxy brought that spark back. Like yourProjects.
Timbow7584
Awesome to hear that it’s brought the spark back into your projects. There are a lot of people jumping into the epoxy pool finally. I’ve already heard complaints from people talking about how it’s played out now, but that’s not the case. Just because you see other makers using epoxy now doesn’t mean that your customers have. Plus… there are so many applications, wait till you see my project that drops tomorrow. Happy building!
I commented on your clock build FB post but this may be a more appropriate place. I’m thinking of using epoxy resin on the top of a desk I’m building; I don’t care about the wood grain showing through as much as I’d like a nice unique finish, and very smooth. Do I need to worry about VOC with this type of epoxy on a desk that will be used often?
Ha, I just saw the FB comment as well. So I’ll preface this and say I’m absolutely not an expert, but the way it’s been explained to me is that most of these table top epoxies are meant to be food safe and will be noted as such. Part of that qualifying process includes offering a drying and hardening time before usage. So you would not have to worry about the gasses if it’s deemed safe to eat off of by the manufacturer. Obviously when using any finishing product upon application there needs to be plenty of ventilation and so… Read more »
I’ve played with small projects so far with Gorilla epoxy and powdered paint pigment. I want to do some bigger pours. Did you mix and pour all at once or do it in lifts? How did you estimate how much to mix so you had enough? I’ve seen where you have used two different brands of epoxy (East Coast & Totalboat), do you have a preference?
Hey Jim! Depending on the thickness of the pour and the type of epoxy/resin I’ll potentially have several pours per project. Something like Total Boat 2:1 epoxy can go about 3/4″-1″ maximum in depth before you start having issues with the curing. They do have a deeper pour product coming out soon similar to eco-epoxy. But with those types of deep pour epoxy/resins they tend to scratch easier. So even if you can do the full depth of pour, you still have to do a clear coat of a normal epoxy over top to prevent scratches. As far as determining… Read more »
I just wanted to say I love this pattern and the color on the blue/black swirl. I spend a lot of time looking around for interesting ideas, but this is perhaps one of my most favorite.
Hey Lazyguy, what do you use to seal your projects? Does it go over the epoxy and the wood?
Depending on the project sometimes I’ll use a table top finish of the same epoxy brand if there’s more epoxy than wood. If it’s vice versa I’ll seal with Rubio mono coat or walrus oil and furniture wax.
Will epoxy work to patch/seal the cracks in my wooden boat? 2″ thick oak. The cracks are in the transom and the epoxy has to be strong enough to handle the weight of the motor pushing against it….and seal out water.
Most of these epoxy/resins were originally developed specifically for marine applications exactly like you’re looking for. The companies have catered some of their products towards crafting and woodworking applications so make sure you’re specifically getting marine grade. MAS and Total Boat all of good options that have various curing time combinations so you can apply dry docked or in water.
Hi! Can I ask what you use on the back side of a hole or cracked area so the epoxy stays with in? I assume it’s something that then comes off so light can come through. Thank you!! Shelley